Good Afternoon,
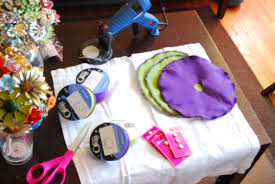
So, today's blog is a DIY tutorial, How to make your own button bouquet !
I'm such a fan of these, they are wonderful keepsakes to remember your big day with and what better than something made by yourself!
Button bouquets come in different forms and so many colours! not only made with buttons but even old bits of jewellery can be added which is a great idea for your something old!
Step by Step guide
1
Stack three to four buttons on top of one another in order of size with the largest button on the bottom.
You can make the stacks all the same or alternative colour combinations for variety in your bouquet.
2
Cut wire for the first flower. The wire should be double the length of the bouquet you intend to make.
3
Thread the buttons onto the wire and push them up until there are about 1.5 inches of wire sticking out the top. Bend this wire down and through the other holes on the buttons. Twist the tail end of the wire around the wire stem of your flower to secure it. Try using fabric cut flower shapes to add texture to your bouquet!
4
Repeat the above steps to make as many button flowers as you want for your bridal bouquet. When the button flowers have all been assembled, bunch them together to form your bouquet.
5
Secure the bouquet using a rubber band just beneath the flowers. Attach a second rubber band around the base of the bouquet.
6
Cut a length of ribbon three times the length of your bouquet stems. Place one end of the ribbon at the top of the bouquet and begin wrapping the ribbon in a spiral motion, tucking in the end as you go. When you reach the bottom, wind your way back up to the top.
7
Secure the loose end of the ribbon with a pin to complete your bridal button bouquet.
No comments:
Post a Comment